Optimize your deployed models for low-latency predictions and high throughput. This guide shows you how to reduce inference time, batch predictions efficiently, cache results, and monitor serving performance.
What you’ll accomplish: By following this guide, you’ll optimize your model serving endpoints to achieve <100ms prediction latency, increase throughput, and implement effective caching strategies for production workloads.
Tip
If you haven’t installed Xorq yet, then see the installation guide for setup instructions.
Set up a test Flight server
The examples on this page assume a local Flight server is running. Follow the steps below to create a minimal UDXF, build it, and start the server so you can run the connection-pool and caching examples.
Create a test_udxf.py file in your project directory with this content:
Define a simple processing function that copies the input DataFrame and adds a prediction column with a constant value. This mirrors the behavior expected by the examples on this page.
2
Define input and output schemas using xo.schema(), ensuring the Flight server knows the exact structure of incoming rows and the resulting predictions.
3
Create an in-memory input table with sample feature values using xo.memtable(). This table is used only to build the UDXF expression; it is not used at runtime during serving.
4
Build the UDXF expression with xo.expr.relations.flight_udxf(), wiring in the processing function, schemas, connection, and make_udxf_kwargs so the server exposes an exchange named "default" that matches the client code.
xorq build test_udxf.py --expr-name expr
This creates a directory like builds/<BUILD_HASH>/. Copy your hash from the build output.
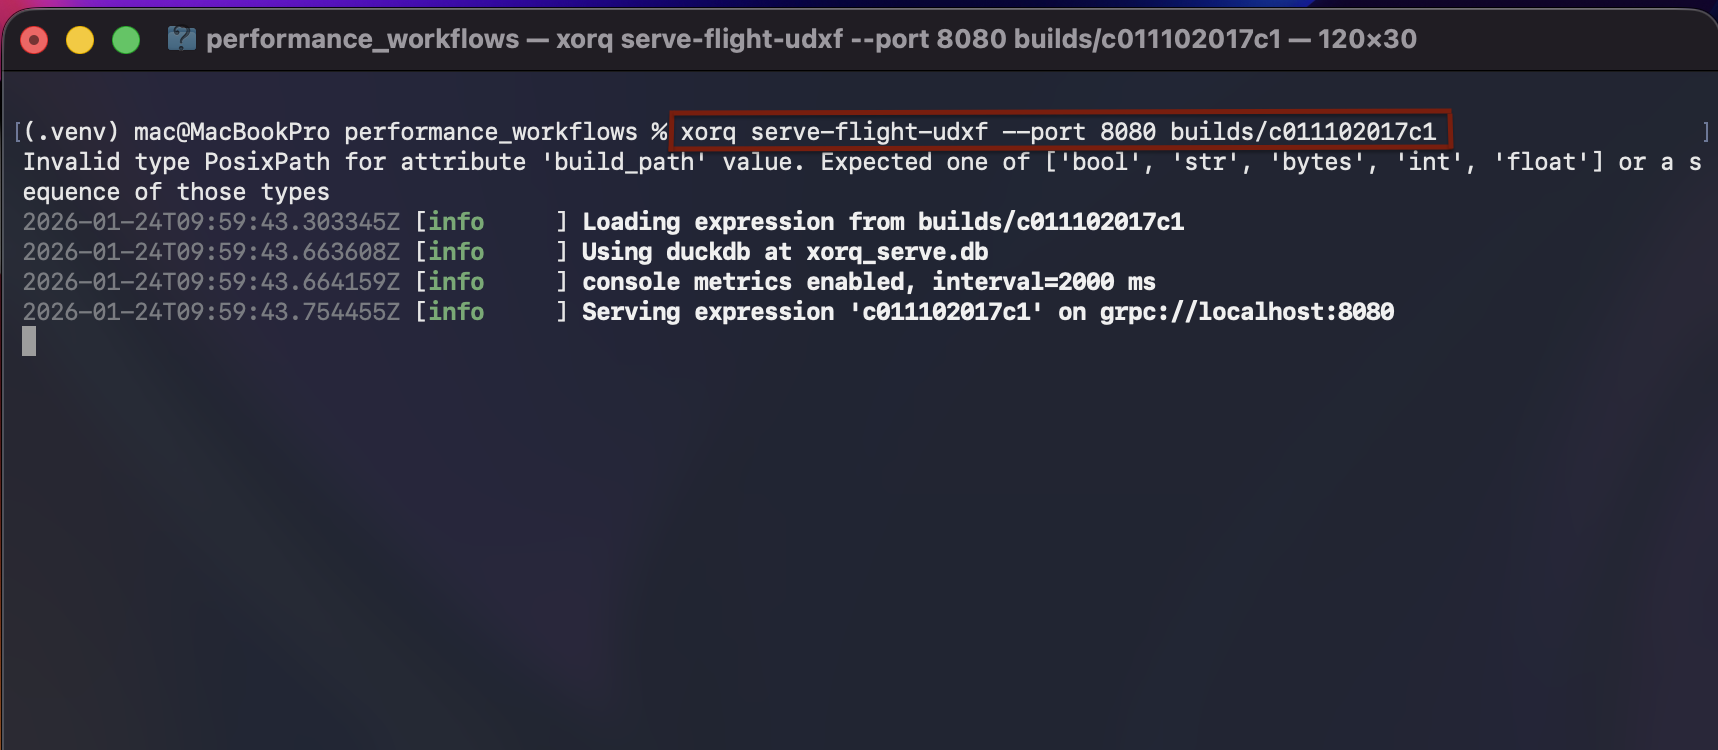
In Terminal 1, start the Flight server and leave it running:
In Terminal 2, run the code examples on this page by saving each snippet as a .py file, for example connection_pool.py or singleton_client.py, and running them with Python while the server in Terminal 1 stays running. Reusing the same connection across requests reduces overhead and improves latency.
Reuse client connections
Create a connection pool or a singleton client for your application. All examples in this section assume the test Flight server is running and exposes an exchange named "default".
Create a connection pool
Use a connection pool to manage multiple client connections:
Create connection_pool.py:
import xorq.api as xofrom threading import Lockfrom queue import Queueclass FlightConnectionPool:def__init__(self, host="localhost", port=8080, pool_size=5):self.host = hostself.port = portself.pool_size = pool_sizeself._pool = Queue(maxsize=pool_size)self._lock = Lock()# Pre-populate poolfor _ inrange(pool_size):try: con = xo.flight.connect(host=self.host, port=self.port)self._pool.put(con)except (OSError, ConnectionError, Exception):# Server not available, pool will create connections on demandpassdef get_connection(self):"""Get a connection from the pool."""try:returnself._pool.get_nowait()except:# Pool exhausted, create new connectionreturn xo.flight.connect(host=self.host, port=self.port)def return_connection(self, con):"""Return a connection to the pool."""try:self._pool.put_nowait(con)except:# Pool full, close connectionpasstry: pool = FlightConnectionPool(host="localhost", port=8080, pool_size=5)import pandas as pd test_data = pd.DataFrame({"feature1": [1.0, 2.0],"feature2": [0.5, 1.5] })# Wrap the pandas DataFrame as a Xorq table expression test_table = xo.memtable(test_data) con = pool.get_connection()try: backend = con exchange = backend.get_exchange("default")# Send the Xorq expression to the exchange and execute to get a DataFrame result = exchange(test_table).execute()print("You should see a result like this:")print(result)finally: pool.return_connection(con)except (OSError, ConnectionError, Exception) as e:print(f"Note: Flight server not available ({type(e).__name__}). Start a Flight server to see results.")print("Example output would show prediction results as a pandas DataFrame.")
1
Import xorq.api for Xorq operations, threading.Lock for thread safety, and queue.Queue for connection pool management. Define a connection pool class that pre-populates connections and manages their lifecycle.
2
Initialize the connection pool with host and port. The pool pre-creates connections to avoid connection overhead.
3
Import pandas for DataFrames, create test data, and wrap it as a Xorq table expression with xo.memtable(). Get a connection from the pool, send the expression to the exchange, execute it to get a DataFrame, and return the connection to the pool in a finally block to ensure proper cleanup.
4
Display the prediction results.
You should see a result like this:
   feature1  feature2  prediction
0       1.0       0.5         0.5
1       2.0       1.5         0.5
The output shows the prediction results as a pandas DataFrame, with a prediction column for each row in the input data.
Pool size should match expected concurrency. Handle connection failures gracefully and close connections when the pool is complete.
Use a singleton client for single-threaded apps
For single-threaded applications, use a singleton client:
Create singleton_client.py:
import xorq.api as xo_client =Nonedef get_client():global _clientif _client isNone: _client = xo.flight.connect(host="localhost", port=8080)return _clientimport pandas as pdtest_data = pd.DataFrame({"feature1": [1.0, 2.0],"feature2": [0.5, 1.5]})test_table = xo.memtable(test_data)try: con = get_client() backend = con exchange = backend.get_exchange("default") result = exchange(test_table).execute()print("You should see a result like this:")print(result)except (OSError, ConnectionError, Exception) as e:print(f"Note: Flight server not available ({type(e).__name__}). Start a Flight server to see results.")print("Example output would show prediction results as a pandas DataFrame.")
1
Import xorq.api for Xorq operations. Initialize module-level variable for the singleton client pattern.
2
Define a function that returns a singleton client connection. The first call establishes the connection using xo.flight.connect() with the host and port; subsequent calls return the same connection.
3
Import pandas for DataFrames and create test data, then wrap it as a Xorq table expression with xo.memtable(). Use the singleton client for predictions by sending the expression to the exchange and executing it to get a DataFrame. The same connection is reused across all requests, avoiding connection overhead.
4
Display the prediction results.
You should see a result like this:
   feature1  feature2  prediction
0       1.0       0.5         0.5
1       2.0       1.5         0.5
The output shows the prediction results as a pandas DataFrame, with a prediction column for each row in the input data.
The Singleton pattern works for single-threaded applications. For multi-threaded apps, use a thread-safe connection pool instead.
Cache prediction results
Cache frequently requested predictions to reduce computation and improve latency.
Enable server-side caching
Use the --cache-dir flag to enable server-side caching:
This example assumes you have a built expression named fraud-detection-prod, for example from a deployment guide, and a tag source_input defined when building that expression.
Key points:
Server-side caching reduces computation for repeated inputs
Cache directory should use fast storage (SSD)
Monitor cache hit rates to optimize cache size
Cache client-side results
For client-side caching, cache prediction results based on input hash:
Create client_cache.py:
import hashlibimport pickleimport xorq.api as xodef hash_dataframe(df):"""Create hash of DataFrame for cache key."""return hashlib.sha256( pickle.dumps(df.values.tobytes()) ).hexdigest()_prediction_cache = {}def cached_predict(con, test_data):"""Predict with client-side caching.""" cache_key = hash_dataframe(test_data)if cache_key in _prediction_cache:return _prediction_cache[cache_key] backend = con exchange = backend.get_exchange("default")# Wrap pandas DataFrame as a Xorq table expression and execute table_expr = xo.memtable(test_data) result = exchange(table_expr).execute() _prediction_cache[cache_key] = resultreturn resultimport pandas as pdimport xorq.api as xotry: con = xo.flight.connect(host="localhost", port=8080) test_data = pd.DataFrame({"feature1": [1.0, 2.0],"feature2": [0.5, 1.5] }) result = cached_predict(con, test_data)print("You should see a result like this:")print(result)except (OSError, ConnectionError, Exception) as e:print(f"Note: Flight server not available ({type(e).__name__}). Start a Flight server to see results.")print("Example output would show prediction results as a pandas DataFrame.")
1
Import hashlib for hashing and pickle for serialization. Define a function that creates a hash of DataFrame values for use as a cache key.
2
Initialize an in-memory cache dictionary to store prediction results.
3
Define a caching prediction function that checks the cache first, and only makes a network request if the result isn’t cached; then store results in the cache for future requests.
4
Import pandas for DataFrames and xorq.api for Xorq operations. Connect to the Flight server using xo.flight.connect() with host and port, create test data, and use the caching function to make predictions. Display the results.
You should see a result like this:
   feature1  feature2  prediction
0       1.0       0.5         0.5
1       2.0       1.5         0.5
The output shows prediction results as a pandas DataFrame. The first call fetches from the server; subsequent calls with identical input return cached results without network requests.
Client-side caching reduces network round-trips. Use an appropriate cache eviction policy (LRU, TTL) and monitor memory usage for large caches.
Optimize batch size
Batch multiple predictions together to improve throughput and reduce per-request overhead.
Batch predictions efficiently
Send multiple rows in a single request:
Create batch_predictions.py:
import pandas as pdimport xorq.api as xotry: con = xo.flight.connect(host="localhost", port=8080) backend = con exchange = backend.get_exchange("default") batch_data = pd.DataFrame({"feature1": [1.0, 2.0, 3.0, 4.0, 5.0],"feature2": [0.5, 1.5, 2.5, 3.5, 4.5] }) batch_expr = xo.memtable(batch_data) predictions = exchange(batch_expr).execute()print("You should see a result like this:")print(predictions)except (OSError, ConnectionError, Exception) as e:print(f"Note: Flight server not available ({type(e).__name__}). Start a Flight server to see results.")print("Example output would show predictions for all rows in the batch as a pandas DataFrame.")
1
Import pandas for DataFrames and xorq.api for Xorq operations. Connect to the Flight server using xo.flight.connect() with host and port, and get the exchange for predictions.
2
Create a DataFrame with multiple rows to batch together in a single request.
3
Send all rows in a single request and receive predictions for the entire batch.
4
Display the batch prediction results.
You should see a result like this:
   feature1  feature2  prediction
0       1.0       0.5         0.5
1       2.0       1.5         0.5
2       3.0       2.5         0.5
3       4.0       3.5         0.5
4       5.0       4.5         0.5
The output shows predictions for all rows in the batch as a pandas DataFrame, with prediction columns for each input row.
Batch size should balance latency and throughput. Larger batches improve throughput but increase latency. Test optimal batch size for your workload.
Stream large batches
For very large batches, stream results to manage memory:
Create stream_batches.py:
import pandas as pdimport xorq.api as xotry: con = xo.flight.connect(host="localhost", port=8080) backend = con exchange = backend.get_exchange("default")# Use float dtypes to match the UDXF input schema large_batch = pd.DataFrame({"feature1": pd.Series(range(100000), dtype="float64"),"feature2": pd.Series(range(100000, 200000), dtype="float64") }) large_batch_expr = xo.memtable(large_batch)# Execute once, then process results in chunks client-side result = exchange(large_batch_expr).execute()print("You should see a result like this:") chunk_size =50_000for i inrange(0, len(result), chunk_size): batch = result.iloc[i:i + chunk_size]print(f"Batch {i // chunk_size +1}: {len(batch)} rows")if i ==0:print(batch.head())# Process remaining batches...if i >=2* chunk_size: # Limit output for examplebreakexcept (OSError, ConnectionError, Exception) as e:print(f"Note: Flight server not available ({type(e).__name__}). Start a Flight server to see results.")print("Example output would show the number of rows in each streamed batch.")
1
Import pandas for DataFrames and xorq.api for Xorq operations. Connect to the Flight server using xo.flight.connect() with host and port, and get the exchange for predictions.
2
Create a large DataFrame with many rows using float dtypes that match the UDXF input schema.
3
Wrap the DataFrame as a Xorq table expression, execute it once via the Flight exchange, and then process the results in fixed-size chunks client-side. Display batch information and sample rows from the first batch.
You should see a result like this:
Batch 1: 50000 rows
   feature1  feature2  prediction
0         0    100000         0.5
1         1    100001         0.5
2         2    100002         0.5
3         3    100003         0.5
4         4    100004         0.5
Batch 2: 50000 rows
Batch 3: 0 rows
The output shows the number of rows in each processed batch and displays the first few rows of the first batch as a sample.
Streaming reduces memory usage for large datasets. Process results incrementally to avoid memory errors.
Benchmark latency
Measure prediction latency to identify bottlenecks and track performance improvements.
Time individual predictions
Measure end-to-end prediction latency:
Create time_predictions.py:
import timeimport pandas as pdimport xorq.api as xotry: con = xo.flight.connect(host="localhost", port=8080) backend = con exchange = backend.get_exchange("default") test_data = pd.DataFrame({"feature1": [1.0, 2.0],"feature2": [0.5, 1.5] }) start = time.time() test_expr = xo.memtable(test_data) result = exchange(test_expr).execute() latency = (time.time() - start) *1000# Convert to msprint("You should see a result like this:")print(f"Prediction latency: {latency:.2f}ms")except (OSError, ConnectionError, Exception) as e:print(f"Note: Flight server not available ({type(e).__name__}). Start a Flight server to see results.")print("Example output would show: Prediction latency: XX.XXms")
1
Import time for timing measurements, pandas for DataFrames, and xorq.api for Xorq operations. Connect to the Flight server using xo.flight.connect() with host and port, and get the exchange.
2
Create test data with sample feature values for prediction.
3
Time the prediction request by measuring elapsed time before and after the exchange call, converting to milliseconds.
4
Display the measured latency in milliseconds.
You should see a result like this:
Prediction latency: 15.23ms
The output shows the prediction latency in milliseconds for a single prediction request.
Profile with multiple requests
Profile latency under load:
Create profile_latency.py:
import timeimport statisticsimport pandas as pdimport xorq.api as xotry: con = xo.flight.connect(host="localhost", port=8080) backend = con exchange = backend.get_exchange("default") test_data = pd.DataFrame({"feature1": [1.0, 2.0],"feature2": [0.5, 1.5] }) latencies = []for _ inrange(100): start = time.time() test_expr = xo.memtable(test_data) result = exchange(test_expr).execute() latency = (time.time() - start) *1000 latencies.append(latency)print("You should see a result like this:")print(f"Mean latency: {statistics.mean(latencies):.2f}ms")print(f"Median latency: {statistics.median(latencies):.2f}ms")print(f"P95 latency: {statistics.quantiles(latencies, n=20)[18]:.2f}ms")print(f"P99 latency: {statistics.quantiles(latencies, n=100)[98]:.2f}ms")except (OSError, ConnectionError, Exception) as e:print(f"Note: Flight server not available ({type(e).__name__}). Start a Flight server to see results.")print("Example output would show latency statistics (mean, median, P95, P99).")
1
Import time for timing, statistics for calculating percentiles, pandas for DataFrames, and xorq.api for Xorq operations. Connect to the Flight server using xo.flight.connect() with host and port, and create test data.
2
Run 100 prediction requests and collect latency measurements for each request.
3
Calculate and display latency statistics, including mean, median, P95, and P99 percentiles.
You should see a result like this:
Mean latency: 18.45ms
Median latency: 17.23ms
P95 latency: 25.67ms
P99 latency: 32.11ms
The output displays latency statistics, including mean, median, P95, and P99 percentiles, calculated from 100 prediction requests.
Monitor serving performance
Use Prometheus metrics to monitor serving performance and set up alerts.
Enable Prometheus metrics
Enable metrics when starting the server (again assuming a built expression like fraud-detection-prod and a tag source_input):